Hello and welcome back to the third part of our series on Kubernetes bare metal deployment – deploying the Kubernetes Workload Cluster.
In Part 2, we already prepared the environment for the deployment, we just need now to start the deployment of our Workload Kubernetes cluster on two bare metal servers (two ARM64 Ampere Computing ALTRA Mt. Collins servers).
Prerequisites
Before starting the deployment, we need to take some time discussing the status quo of ARM64 support on the different open source projects we use for the automation and the necessary changes that are in the process of being upstreamed.
While k3d, ArgoCD, helm, clusterctl, Cilium worked out of the box on both ARM64 and AMD64, Bird, Tinkerbell’s Hook and Boots, Ceph, Kubevirt, virtctl and virt-vnc, Flatcar, Cluster API image builder — all required some code changes or building the missing ARM64 Docker image:
- Bird – missing Docker image for ARM64
- Tinkerbell Hook – missing RTC, SAS and XHCI in its Linux Kernel Configuration
- Tinkerbell Boots – improve iPXE boot times to not wait for all NICs to be tried
- Ceph on Flatcar requires mon_osd_crush_smoke_test=false, otherwise mons enter an infinite loop
- Kubevirt docker images for ARM64 were broken since March 2023 (were in fact, for AMD64)
- virtctl binary is not released for ARM64 (manual building is required)
- virt-vnc – missing Docker image for ARM64
- Flatcar – missing VirtIO GPU driver in its Linux Kernel Configuration
- Cluster API image builder – no support to build ARM64 images
All the above issues have either been already solved upstream or we have patches that have been sent upstream and are in review process.
With the issues above solved, we can start the preparation for deployment.
Hardware definitions
First, we need to define Tinkerbell Hardwares and Machines.
Hardware is the CRD that has the information about the bare metal server (architecture, storage, networking), and Machine is the CRD that has the information about the BMC (IP, username, password).
|
1 2 |
argocd app sync hardware argocd app sync machine |
Deploying the workload cluster
Now we are ready to initialize the Cluster API workflows that will end up creating the K8S Workload Cluster:
|
1 2 3 4 5 6 |
until argocd app sync workload-cluster; do sleep 1; done clusterctl get kubeconfig kub-poc -n tink-system > ~/kub-poc.kubeconfig until kubectl --kubeconfig ~/kub-poc.kubeconfig get node -A; do sleep 1; done until kubectl --kubeconfig ~/kub-poc.kubeconfig get node sut01-altra; do sleep 1; done until kubectl --kubeconfig ~/kub-poc.kubeconfig get node sut02-altra; do sleep 1; done |
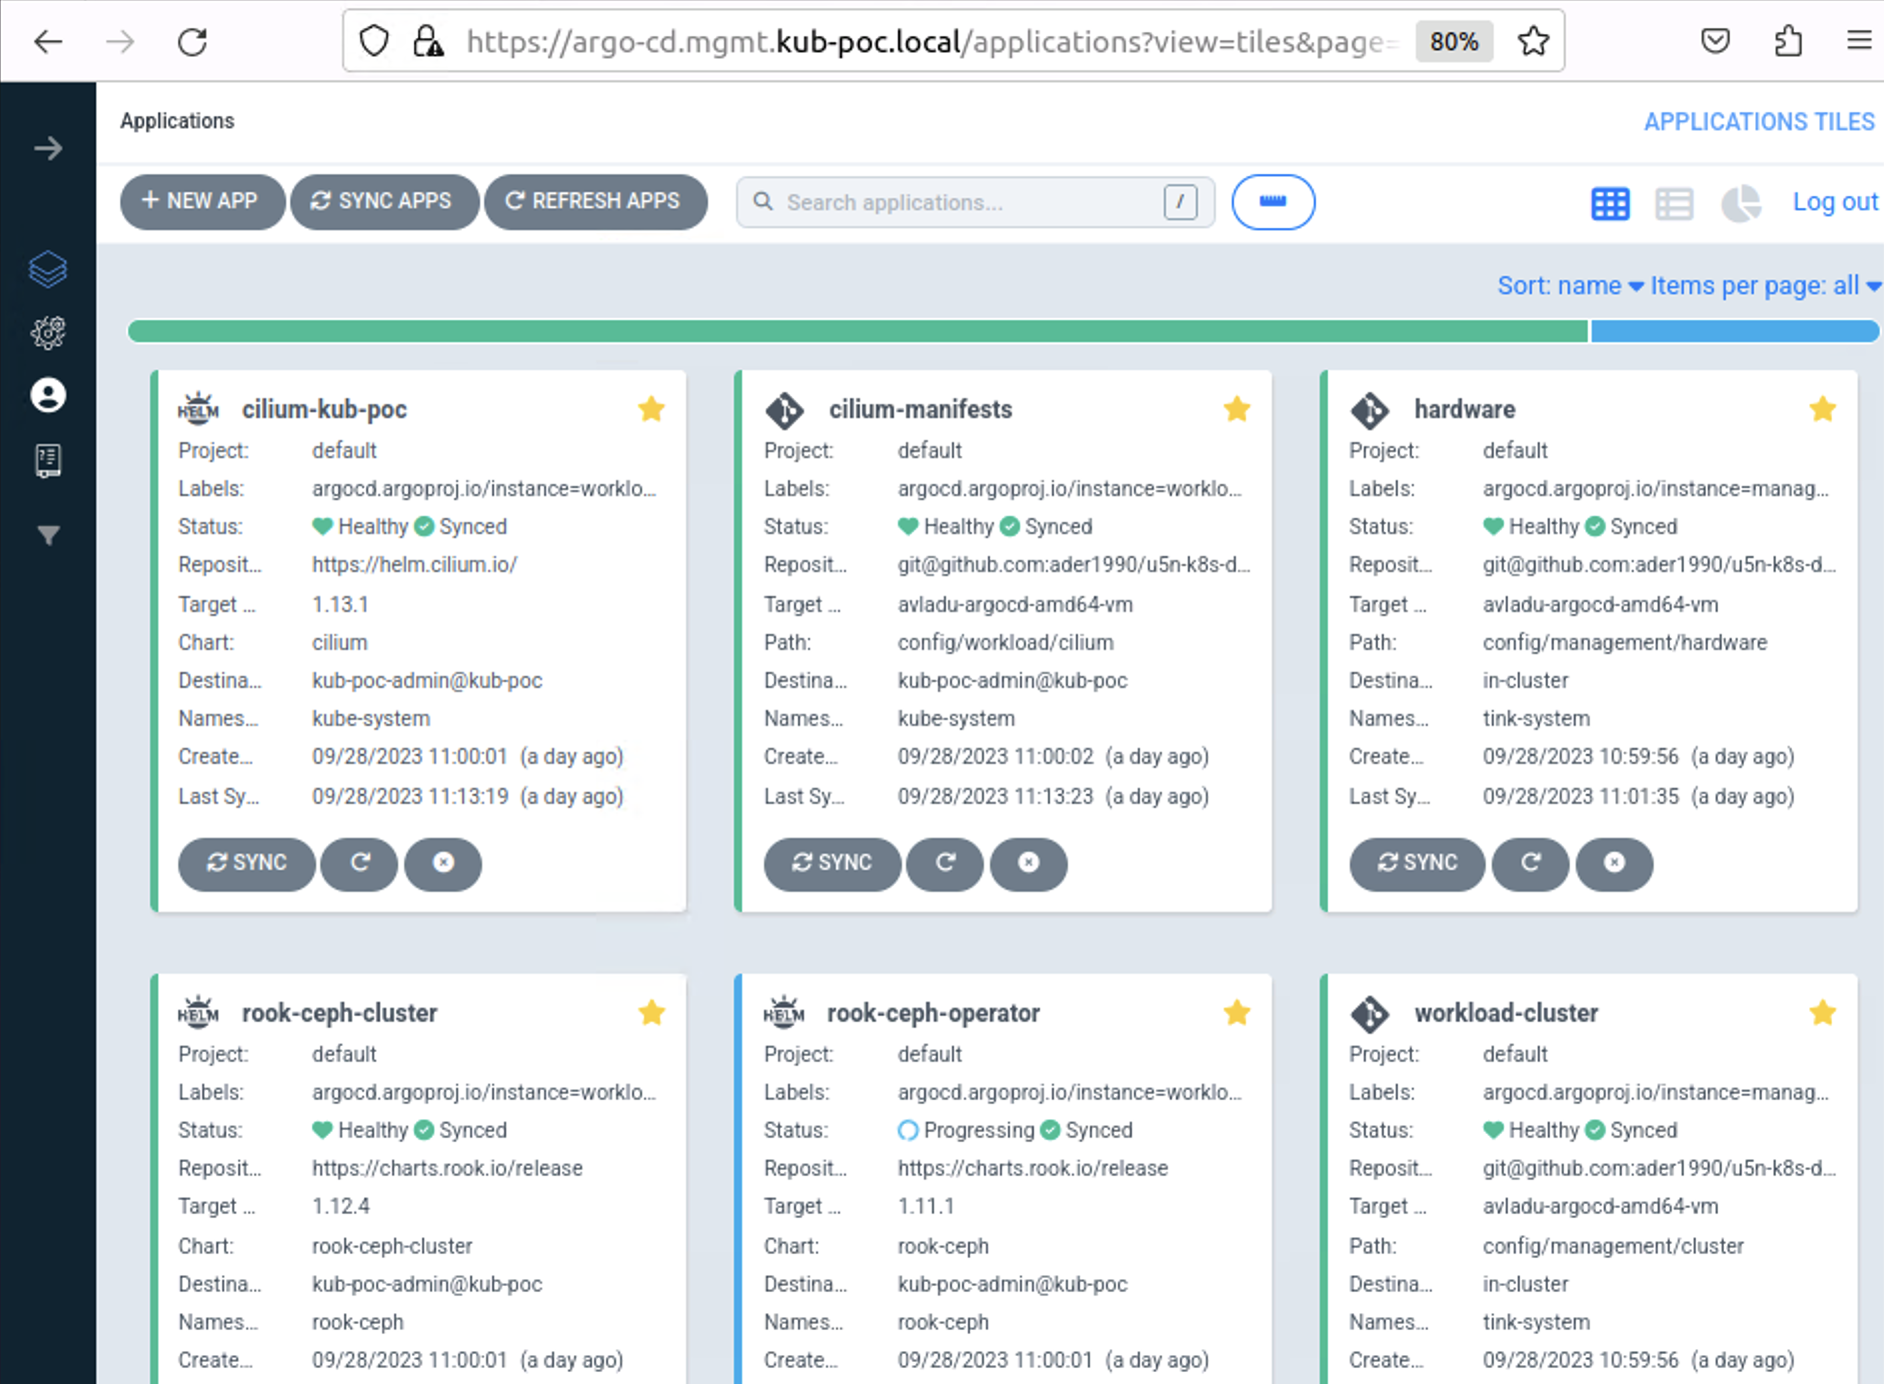
As this stage will take a while (around 10 minutes), ArgoCD Web UI can be used to visualize the status of the operations (see Part 2 for more details)
Adding the workload cluster in ArgoCD
Once our 2 node Workload cluster has been created, we can add it to ArgoCD for further automation and synchronize the Workload Cluster Applications:
|
1 2 3 4 5 6 7 8 9 10 |
argocd cluster add kub-poc-admin@kub-poc \ --kubeconfig ~/kub-poc.kubeconfig \ --server argo-cd.mgmt.kub-poc.local \ --insecure --yes argocd app create workload-cluster-apps \ --repo git@github.com:cloudbase/k8sbm.git \ --path applications/workload --dest-namespace argo-cd \ --dest-server https://kubernetes.default.svc \ --revision "main" --sync-policy automated |
Configuring the CNI
At this moment, our K8S Workload cluster is the most basic K8S cluster there is, it has no networking or storage services. As Cilium is yet to be installed, the coredns pods are still in Pending status.

The next step is to install the CNI (Container Network Interface) using Cilium with BGP external connectivity. At this moment, we need to install on the K8S Management Cluster, the Bird host network container, that will allow us to connect to the External IPs from the K8S Workload Cluster.
|
1 2 |
argocd app sync bird until kubectl get CiliumLoadBalancerIPPool --kubeconfig ~/kub-poc.kubeconfig || (argocd app sync cilium-manifests && argocd app sync cilium-kub-poc); do sleep 1; done |

Storage Configuration
Once we have the CNI up and running, we can move to the CSI (Container Storage Interface) installation, leveraging Rook and Ceph. Ceph OSDs are configured to use the second NVME disk, an Intel SSD, on both Altra nodes. For this to happen, we need to untaint the Control Plane first and then clean up the secondary NVME disks.
|
1 2 3 4 5 6 7 8 9 10 11 12 |
kubectl --kubeconfig ~/kub-poc.kubeconfig patch node sut01-altra -p '{"spec":{"taints":[]}}' || true argocd app sync rook-ceph-operator until kubectl --kubeconfig ~/kub-poc.kubeconfig wait deployment -n rook-ceph rook-ceph-operator --for condition=Available=True --timeout=90s; do sleep 1; done KUBECONFIG=~/kub-poc.kubeconfig kubectl node-shell sut01-altra -- sh -c 'export DISK="/dev/nvme1n1" && echo "w" | fdisk $DISK && sgdisk --zap-all $DISK && blkdiscard $DISK || sudo dd if=/dev/zero of="$DISK" bs=1M count=100 oflag=direct,dsync && partprobe $DISK && rm -rf /var/lib/rook' KUBECONFIG=~/kub-poc.kubeconfig kubectl node-shell sut02-altra -- sh -c 'export DISK="/dev/nvme1n1" && echo "w" | fdisk $DISK && sgdisk --zap-all $DISK && blkdiscard $DISK || sudo dd if=/dev/zero of="$DISK" bs=1M count=100 oflag=direct,dsync && partprobe $DISK && rm -rf /var/lib/rook' argocd app sync rook-ceph-cluster until kubectl --kubeconfig ~/kub-poc.kubeconfig -n rook-ceph exec -it deploy/rook-ceph-tools -- ceph status; do sleep 1; done |
The output of the rook-ceph namespaced pods and ceph status command should look like this:

After around 10 minutes, all the rook-ceph pods are nicely running / completed succesfully and we have two functional managers, 3 monitors (for quorum) and two OSDs ready to be used, amounting to 1.8TiB of free space.
These were the steps to automate the deployment of the K8S Workload cluster. The entire process takes around half an hour using the hardware of choice.
Next up in the series, we will proceed to validate the K8S Workload Cluster in Part 4.


